No products in the cart.
APPLICATION
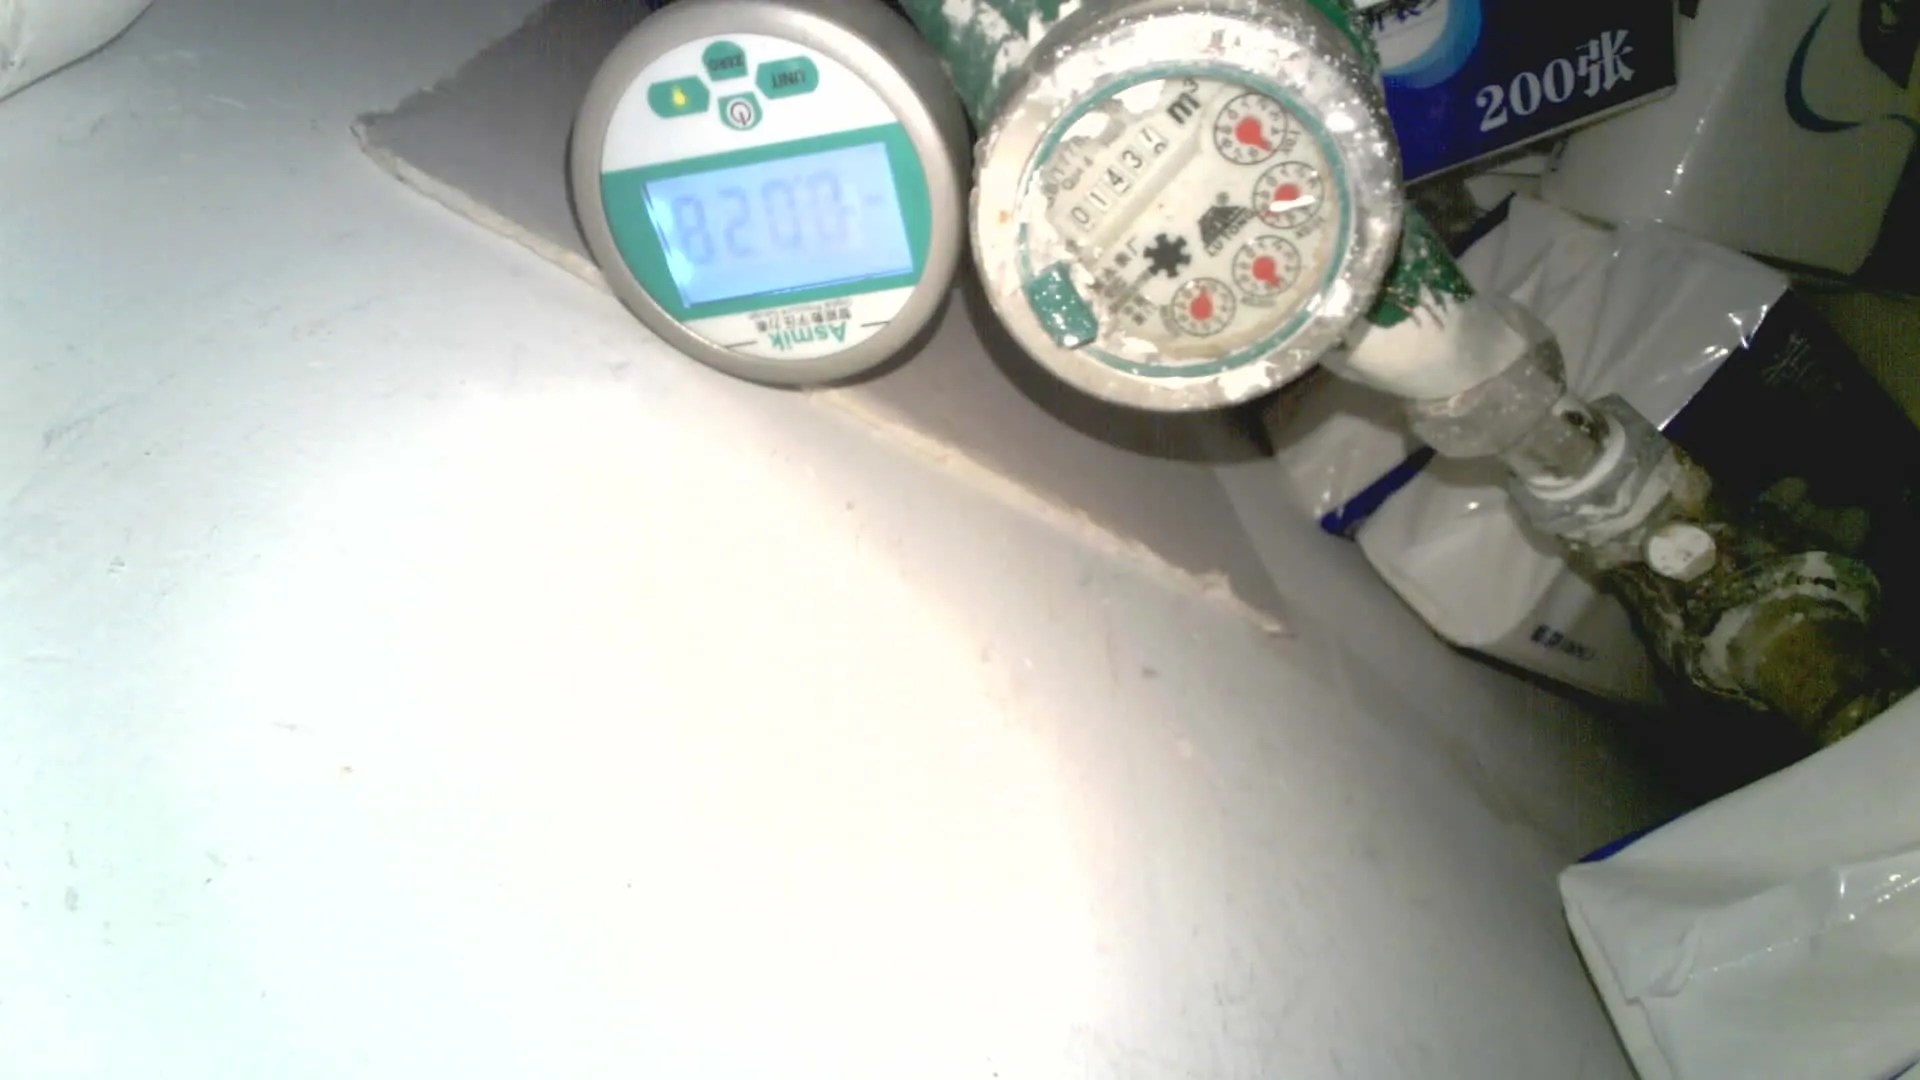
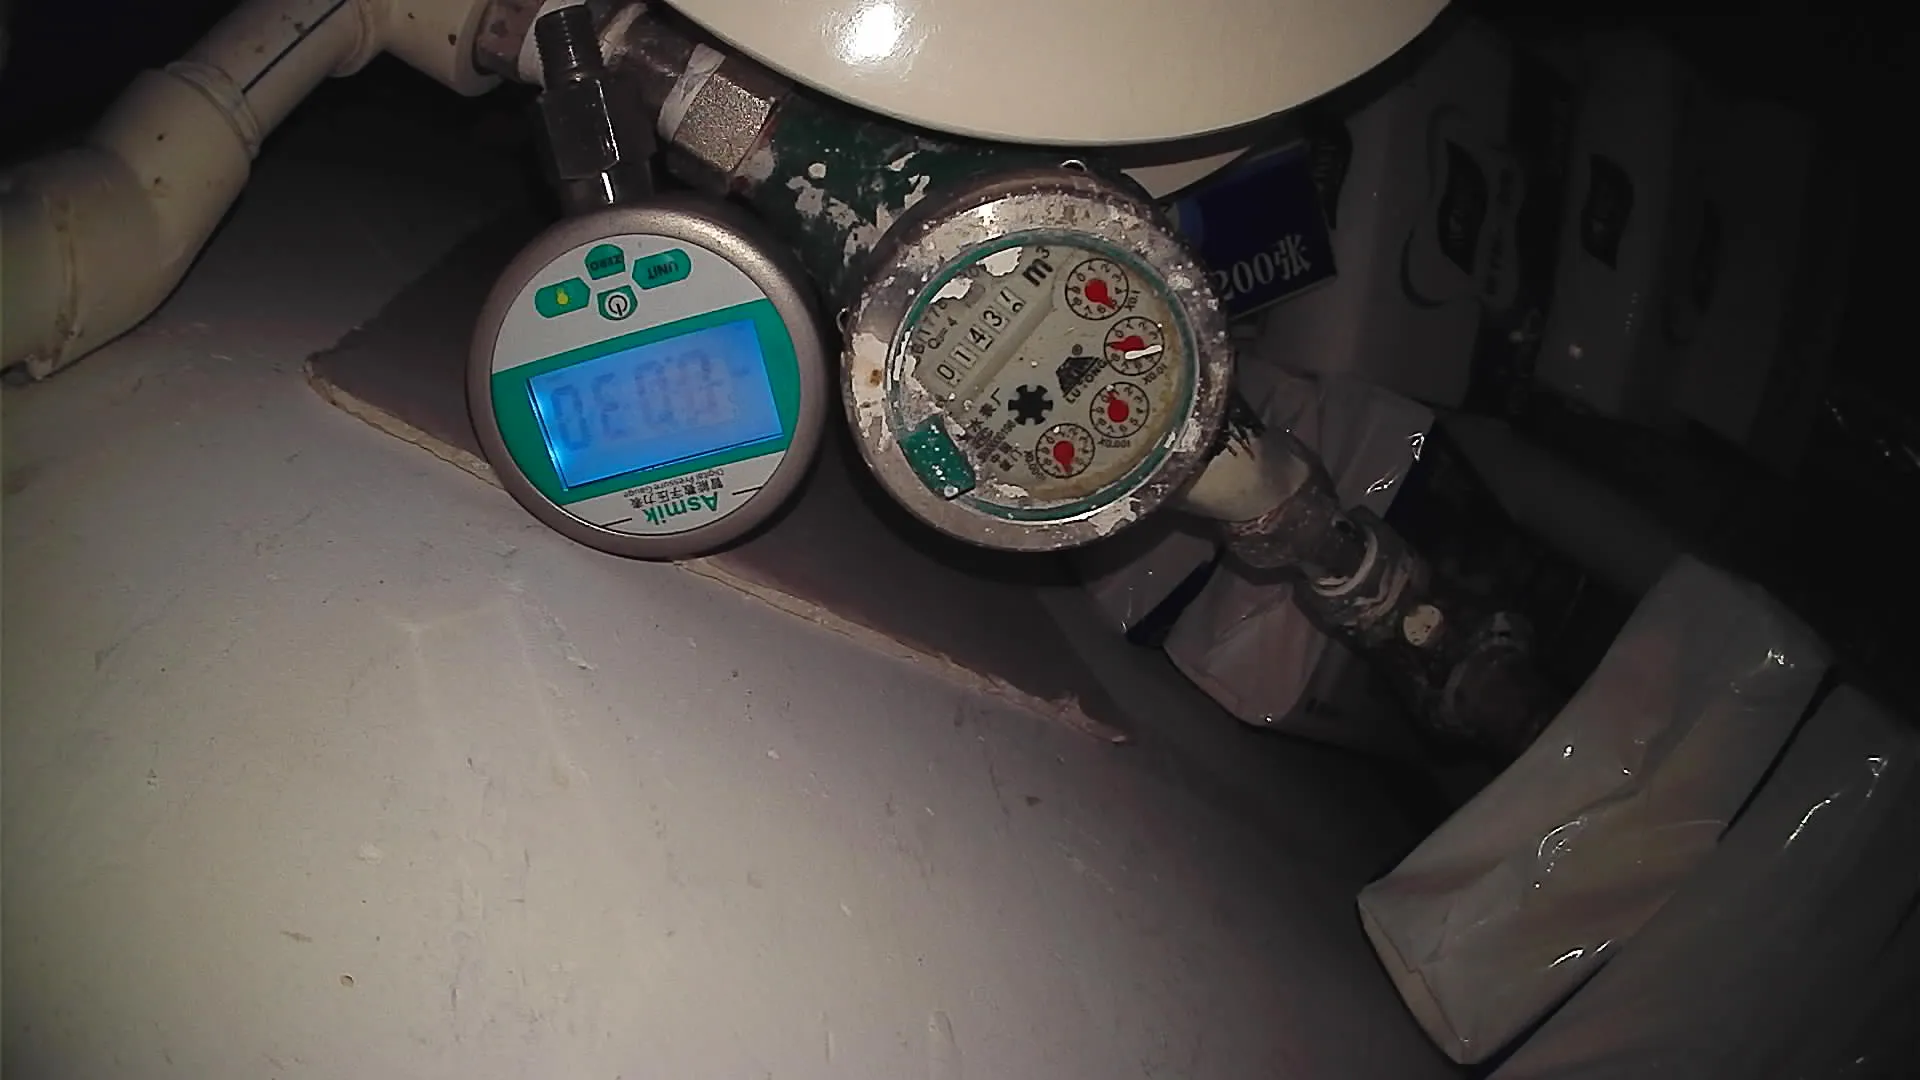
Dark Meter Reading OCR:
How to Configure NE101 Fill Light for Clear Images
Underground meter pits and sealed utility cabinets share one problem: no ambient light. Without proper illumination, dial images are too dark or too uneven for reliable digit extraction. This guide covers exactly how the NeoEyes NE101 built-in fill light works — the four firmware modes, how to configure each one via Web UI, and how image parameter settings affect what the NeoMind OCR plugin receives.
How to Improve Meter OCR in Low Light?
To improve meter OCR in low-light environments, you need clear, evenly illuminated images before tuning OCR models or adjusting MQTT pipelines.
Poor lighting is the most common reason meter OCR fails because dark or uneven images reduce digit contrast before OCR even starts. In underground meter pits, basement plant rooms, and sealed utility cabinets, there is often little to no ambient light. In some cases, a single overhead strip or a small opening introduces hard shadows across the dial face.
Poor lighting creates two compounding problems. First, low light forces the camera sensor to raise its gain, introducing noise that blurs digit edges. Second, uneven lighting — a torch from one side, a crack of daylight from a hatch — creates inconsistent exposure across captures from the same device. The OCR accuracy you measure on one capture may not reflect the next.
The NE101 has a built-in front-facingfill light that can be configured entirely
through the Web UI—no wiring, GPIO control, or firmware changes required. It offers four fill light
modes for different deployment scenarios, helping produce more consistent images for OCR.
Configuring the fill light correctly before evaluating OCR performance can save significant troubleshooting time downstream.
Camera module note
The NE101 supports two camera types: OV5640 (CPI) and SC200AI (USB). Both support fill light configuration. However, image adjustment parameters (brightness, contrast, saturation) are available on the OV5640 module only. The USB module supports fill light settings only — see NE101 Camera Configuration.
The Four Fill Light Modes
For most underground or sealed meter deployments, Automatic mode is the best option because it turns on only when ambient light is too low, balancing image quality and battery life. Customization mode is ideal for cabinets that are dark at night but receive some daylight during the day. Always On is only recommended for wired or solar deployments where power draw is not a concern. Always Off is the factory default — change it before deploying in any dark environment.
To configure the fill light, open the NE101 Web UI at 192.168.1.1 and navigate to
Image Settings → Fill Light Mode. The default is
Always Off , so you must actively enable a mode for dark deployments.
Light intensity is adjustable from 1 to 100 in Automatic and Customization modes.
Always On mode uses fixed brightness and does not support intensity adjustment.
Automatic
Automatic — Recommended for Most Dark Deployments
The fill light fires only when ambient lux drops below a configurable threshold.
You set the threshold, the firmware compares it to a live sensor reading at
capture time, and activates the LED accordingly. Intensity adjustable 1–100.
Best for: Underground pits, sealed cabinets, any enclosure with
no ambient light. The light fires during the capture window and shuts off
immediately after — negligible additional power draw versus Always On.
Customization
Customization — For Predictable Light Cycles
Fill light is enabled only within a configured time window (e.g., 20:00–06:00).
Intensity adjustable 1–100.
Best for: Meter cabinets that receive daylight through a vent
during business hours but are dark overnight. Avoids unnecessary LED operation
when the ambient light is already adequate.
Always On
Always On — Continuous Illumination
Fill light stays on at all times. Intensity is fixed — the Web UI does not
support intensity adjustment in this mode.
Best for: Wired (Type-C or solar) power deployments where
battery life is not a constraint and consistent illumination at every moment
is preferred. Not recommended for battery-only deployments.
Always Off
Always Off — Factory Default
Fill light is disabled at all times.
Best for: Well-lit utility rooms and metering panels where
adding artificial light would cause overexposure or glare on the meter glass.
This is the factory default — change it before deploying in any dark environment.
What Are the NE101 Fill Light Specifications?
Below are the confirmed fill light specifications of the NeoEyes NE101, based on NE101 Product Overview and Quick Start Docs.
Fill light Position
Built into the front face of the NE101
Configuration
Managed in the Web UI only
Brightness Range
1 – 100 in Automatic / Customization
Always On Brightness
Fixed — not adjustable in this mode
Automatic Trigger
Configurable lux threshold
Default Setting
Always Off — must be changed for dark deployments
USB module support
Fill light settings only (OV5640 supports full image params)
Best Use Case
Close-range low-light image capture
How Does Fill Light Affect Battery Life?
In Automatic mode, the fill light turns on only during image capture—typically 5–15 seconds per event. At 6 captures per day, this usually adds minimal power consumption compared with WiFi or LTE transmission in the same window. In Always On mode, the LED remains active continuously and can significantly reduce battery life on 4×AA batteries.
To estimate battery life for your deployment, use the NeoEyes Battery Calculator.
How to Fine-Tune Meter OCR Image Quality (OV5640 Module)
If images are still unclear after configuring the fill light, you can fine-tune brightness, contrast, and saturation in the NE101 Web UI. These controls are available only on the OV5640 camera module, not on the USB (SC200AI) module.
| Parameter | Range (default) | When to adjust | Risk of over-adjusting |
|---|---|---|---|
| Brightness | 0–2 (default: 0) | Image still appears dark after fill light is active and correctly configured. Try 1 first. | Overexposure — washes out digit edges on reflective dial surfaces, reducing OCR accuracy |
| Contrast | 0–2 (default: 0) | Digits blend into the dial background — common on worn or faded dials. Try 1. | Clipping — very high contrast blocks out mid-tone digit details on textured surfaces |
| Saturation | 0–2 (default: 2, per firmware default) | Rarely needs adjustment for standard meter OCR. More relevant when the OCR model uses colour as a feature. | Minor — saturation shifts mainly affect colour rendering, less critical for digit recognition |
| Source: NE101 Low-Power Image Acquisition guide and Quick Start. Adjust one parameter at a time; take a test capture after each change. Defaults restore with the Reset button in Image Settings. | |||
What These Settings Can and Cannot Fix
These sliders provide only limited adjustment and are intended for fine-tuning, not correction of major installation issues. In most cases, correct lens distance, camera angle, and fill light positioning have a bigger impact on OCR accuracy than software adjustments. Fix the physical installation first, then use these settings for final optimization.
Need help selecting the right lens and fill light setup?
Contact UsHow to Set Up NE101 Fill Light in a Dark Meter Pit
1
Mount the NE101
Mount the camera at the correct distance for your lens module to ensure the meter fills most of the frame without cropping.
Compare Fill Light Performance by Camera Module
Different camera modules produce different framing, exposure, and glare behavior in low-light meter environments.
OV5640 120° Module
Higher brightness, but reflective surfaces may show glare.
USB / SC200AI 137° Module
Wider view with more balanced exposure in low light.
2
Access the Web UI
Connect to the NE101 WiFi AP (SSID: NE101_XXXXXX, no password).
3
Enable Automatic Fill Light
Navigate to Image Settings → Fill Light Mode → Automaticand configure the threshold above the current ambient lux reading.
Tip: Start with intensity 60–80.
4
Take a Test Capture
Trigger a capture and check the image in MQTTX or NeoMind.
Tip: Reduce intensity if overexposed; increase it if too dark.
5
Fine-Tune if Needed (OV5640 Only)
Adjust Contrast or Brightness only after fill light is configured correctly.
6
Verify OCR Output in NeoMind
If using the NeoMind OCR plugin, navigate to the OCR panel on your Dashboard. Confirm the OCR result matches the image in NeoMind.
Tip: If the image is clear but OCR is wrong, the issue is likely model-side.
Common Meter OCR Issues and Fixes
If your images are still too dark, washed out, or inconsistent, the issue is usually related to lighting, installation angle, or fill light settings.
| Problem | Likely Cause | Quick Fix |
|---|---|---|
| Images too dark | Fill light off or threshold too low | Enable Automatic mode and raise threshold |
| Dial washed out | Intensity / brightness too high or glare | Reduce intensity or angle the camera |
| Uneven lighting | Camera too close | Increase distance slightly |
| OCR errors with clear image | Model-side issue | Check focus or retrain model |
| In most deployments, installation angle and lighting matter more than software settings. If you’re planning a larger rollout, our team can help validate the setup before deployment. | ||
NeoMind OCR Integration
Once the NE101 delivers clear, well-lit images, NeoMind OCR plugin provides a ready-to-use recognition pipeline without requiring custom model deployment.
The OCR workflow is simple:
NE101 captures → MQTT → NeoMind → OCR plugin → Dashboard + AI Chat query
The OCR plugin works best for clean, high-contrast text, including LCD readouts, segmented displays, and mechanical counters with clear markings. For worn mechanical dials, faded markings, or analogue pointer gauges, OCR accuracy depends heavily on image quality and may require additional model tuning or a custom workflow. In most deployments, image quality—not OCR configuration—is the first factor to get right.
Scope of NeoMind OCR
The built-in OCR plugin handles general text recognition. For high-accuracy digit extraction on specific mechanical meter types, or analogue pointer gauges, CamThink’s algorithm customisation service can train a purpose-built model. Contact the team with sample meter face images to scope the work.
FAQ
Is NE101 Fill Light Off by Default?
Yes. The NE101 ships with Fill Light set to Always Off by default to avoid unnecessary power consumption
and overexposure in bright environments. Change this in the Web UI before deploying in dark locations.
How do I set the lux threshold if I don’t know what value to use?
With the NE101 physically installed inside the meter enclosure, access the Web UI and navigate
to Image Settings → Fill Light Mode → Automatic. Click Refresh in Automatic mode to read the current ambient lux level.
As a starting point, set the threshold to 2–4× that reading.
Does the fill light fire on every scheduled capture or only when dark?
It depends on the mode. In Automatic mode, the fill light fires only
when the ambient lux at capture time is below the threshold you configured.
In Customization mode, it fires only within the configured time window,
regardless of ambient light. In Always On, it fires continuously.
For underground deployments where ambient lux is always near zero, Automatic mode with
a threshold of 10–20 will fire on every capture.
The meter has a glass cover and the fill light causes glare. What should I do?
Glare on glass-covered meters is usually caused by direct reflection from the fill light back into the lens.
The most effective fix is to angle the NeoEyes NE101 5–10° off-centre, so the reflection path no longer points directly at the camera.
Does fill light configuration affect battery life significantly?
In Automatic mode, battery impact is minimal because the light turns on only during capture. Always On can significantly reduce battery life.
See NeoEyes Battery Calculator.